Online world is expanding day by day and so are people getting advanced.
Literally, if you think of a decade ago: How many people had websites?
Very few, right?
Actually, it was a big deal then!
And no body understood why they needed a website.

Today, almost every business and people interested in online world understand the importance of online presence.
And having a website is like wearing an armor when going for the battle!
So how do you go about building one for yourself without having to give money to someone else?
Keep on reading as this will be the simplest article on the internet that will save you a lot of time!
Step 1: Decide Goals

Are you a business? Freelancer? Or an Individual?
What will you be selling or offering?
Simply getting a clear picture of it can help you in deciding what kind of website you need to build.
So decide it and write it on a piece of paper.
Step 2: Buy A Domain Name
A domain is the name of your website on the internet.
You should consider including the name of your business or your personal name in a domain.
So How Do You Find A Domain?
It’s very simple!
My recommendation would be to include either:
- Name
- Business Name
- A word related to your industry that people search
For example:
If you are into education industry, you can have a domain name like:
collegeeducation.com
If you are building your personal brand, you can have your full name like:
someshkumar.in
If you are building a blog, you can have name related to the topic you want to target. Let’s say you want to write about phones, then you can have a domain name like:
bestphonestobuy.com
Find a domain starting at $0.88
powered by Namecheap
Don’t complicate the things and overthink about buying a domain.
Buy it if it fits within any of the 3 scenarios above!
Step 3: Buy A Hosting
Hosting is like a room of your website where you will put things online.
Like when you start a business, you register the name of your business and rent an office to start the business.
Similarly, hosting is the rented office where your website’s data will be kept.
Which Hosting To Choose?
I have been into blogging for several years and have build many websites for my clients too.
I have tried godaddy, bluehost, hostgator and some more, but I’ve found SITEGROUND to be the best one.
The reason being:
- They provide free SSL
- Their servers are very fast
- They give free CDN
- Price isn’t that high
Now, if you don’t know what do the above point means, here’s in short:
SSL, fast servers and CDN are a huge factor that affects SEO. If you have all of these three your chances of ranking in Google increases upto 90%
Most of the hosting providers, charge extra for all of these, but SITEGROUND doesn’t
So I’ll recommend you to buy hosting from SITEGROUND.
So now when you go to site ground, you’ll see a pricing page:
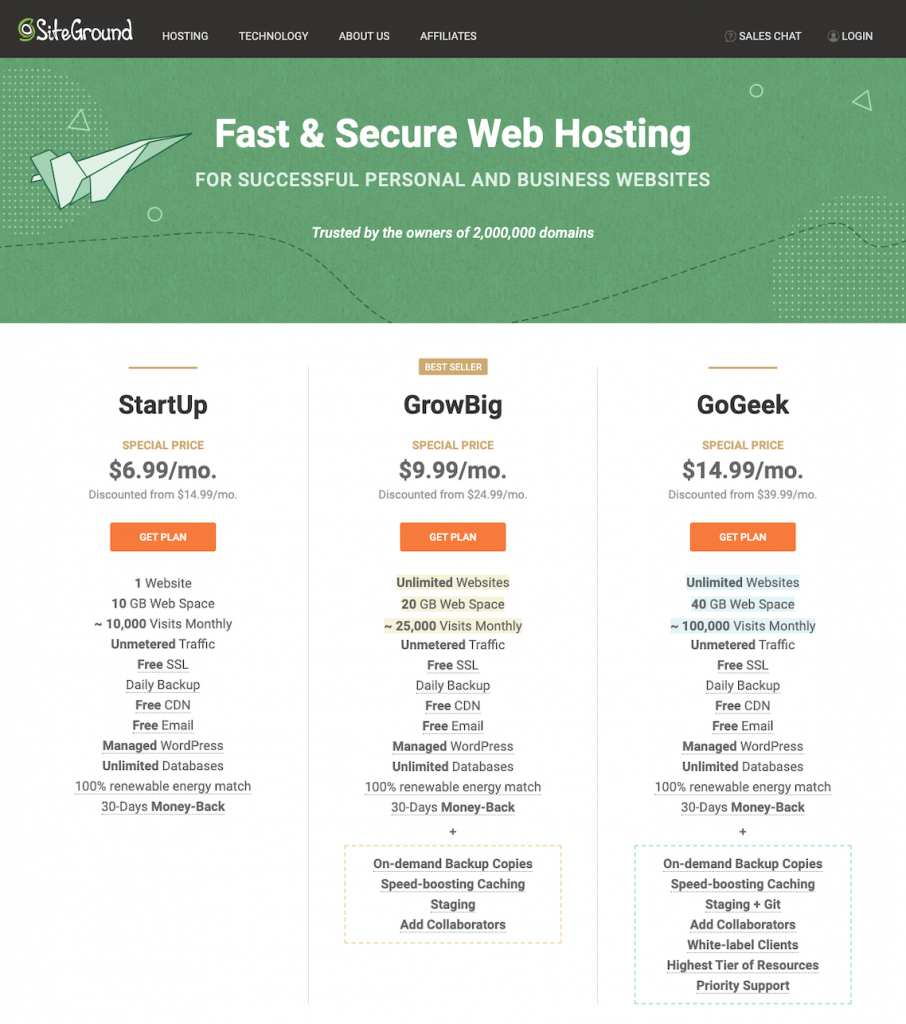
I’ll suggest you to start with the startup plan as this is cheaper and we can switch to bigger hosting plan when we start getting more visitors to our website.
Now, when you click on any of these plans, it will take you to a next page.
Here, you’ll have to enter the domain name that you bought. Or you can click on register to buy it from SiteGround.
Then click on Proceed.
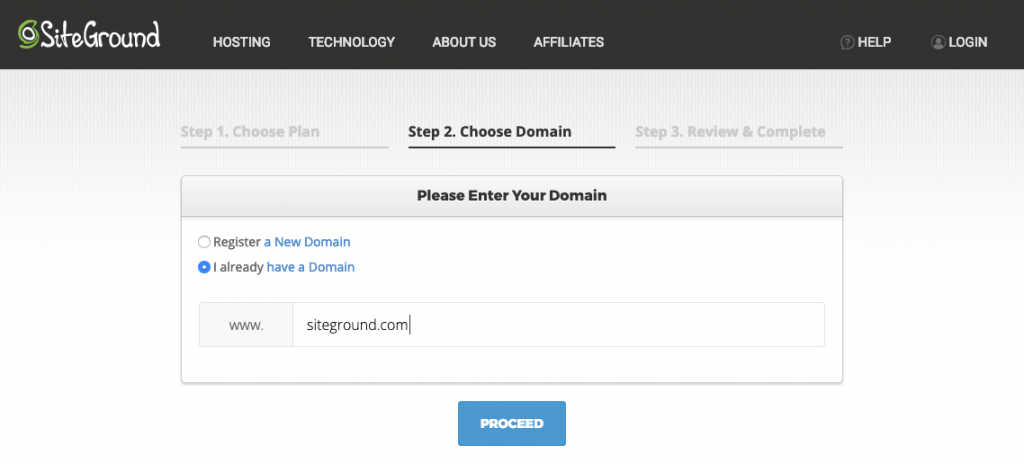
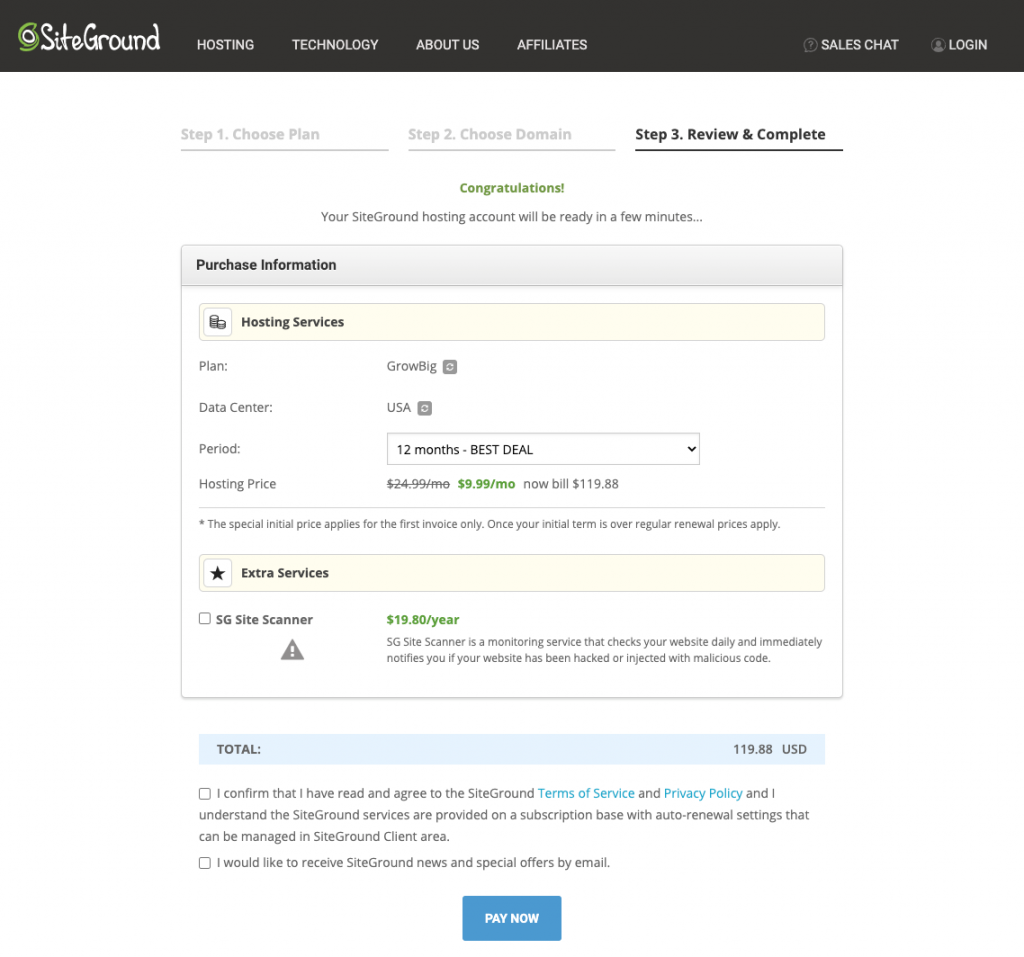
Then the below page will open up to make the payment.
Make the payment here and you will have your hosting successfully purchased.
Step 4: Connecting Domain & Hosting
Now, when you have you have purchased your domain and hosting, the next step is to connect both of them.
To do so, login to SiteGround.
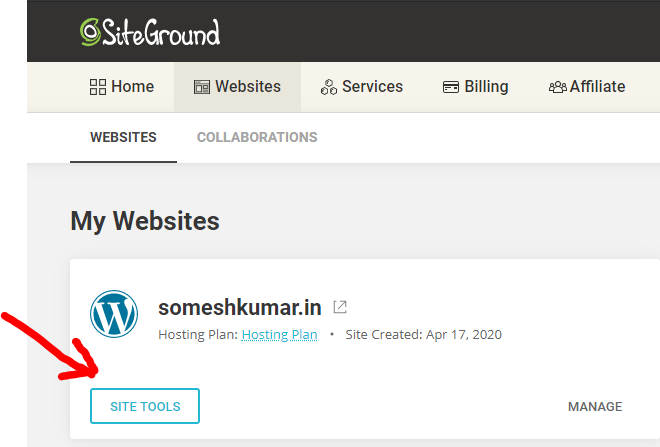
Then click on Websites as shown in the screenshot below:
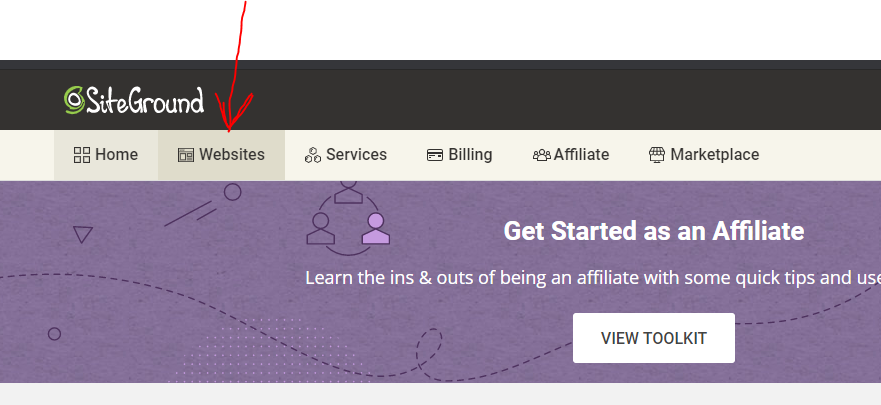
Now, a new page will open. Here you have to click on site tools next to your website name.
See the screenshot below:
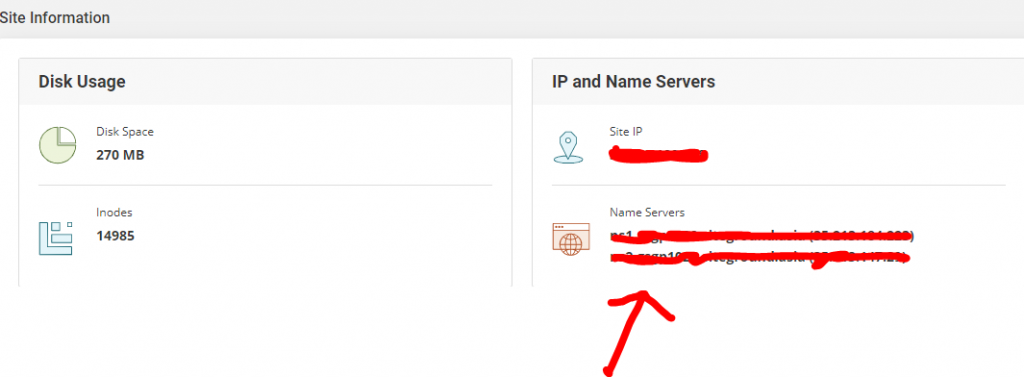
Then another page will open and you will see name servers details of your website here.
See the screenshot below. Keep this page open in a separate tab as we need to put the same information in the DNS of your website on Godaddy.
Now, log in to namecheap.com and you will see your domain name there.
Click on DNS next to it

Then on the next page add the two nameservers that you have copied from SiteGround

Congratulations! You have successfully connected your domain and hosting 🙂
Step 5: Install WordPress
Now it’s the right time to start setting up your website.
So, first of all, we will install WordPress on it.
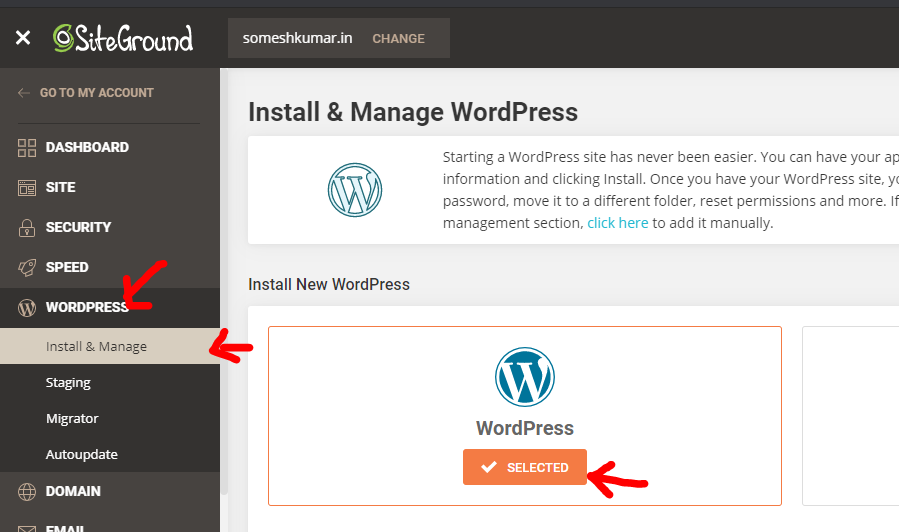
To do so just go to the dashboard of SiteGround and click on WordPress > Install & Manage>Select WordPress
See the screenshot below:
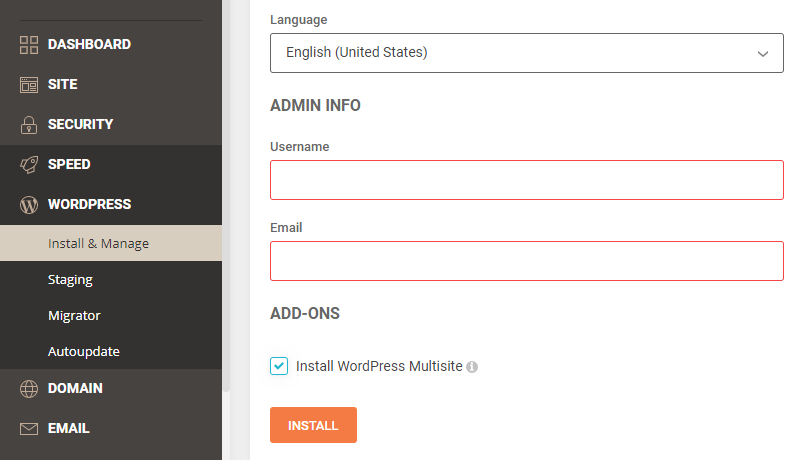
Then if you scroll down, you’ll see option to enter user name, email and password.
This is the login information that will be used to edit your website.
Once you have done this, your website will go live and you can login to the dashboard of your website
by going to www.yourwebsitename.com/wp-admin (replace yourwebsitename with your domain name}
Step 6: Customize To Create Your Website
Watch my video below to do it along.
If you still have any questions, feel free to comment below.


